
PowerPoint by Microsoft is the most popular tool to create all sorts of presentations. Initially released in 1990, the application has undergone several changes and upgrades in the last 3 decades. Apart from its desktop applications, it is now also available for iOS, Android, and even on the web.
Chances are that there could be numerous PowerPoint design tips and functions that you might not be aware of. Don’t worry! I’m here to help you be a PowerPoint ninja with some of the best tips that both beginners and experts can make the most of.
1. Prepare an Outline
Before you start working on PowerPoint, make sure that you have a detailed outline for your presentation. This will not only save your time but would also help you come up with a detailed slideshow. You will not forget about any crucial point and can segregate your content into different slides in advance. You can use any text editor like Word or Google Docs for this.
2. Follow a Minimalistic Approach
Remember, your presentation should work as a visual aid. It should follow you and not the other way round. Most of the experts recommend having a minimalistic approach while drafting a slideshow. It is advisable to go with a standard and basic layout that should not confuse your audience. Also, limit the amount of textual content you use in your slides. Just focus on the crucial points and explain them with your own words rather than the standard content on your slideshow.
3. Pick a Readily Available Layout
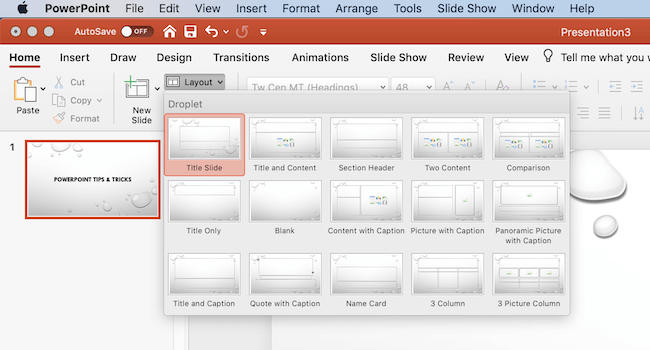
To make things easier for you, PowerPoint already provides numerous layouts that you can pick. For instance, if you want to compare two things, then just pick a readily available layout instead of adding a new slide. To view them, just click on the “Layout” option on the toolbar and pick a preferred option to fit your content.
4. Copy Formatting Style
Too many times, while merging documents or copying slides, the overall formatting of the entire document gets distorted. With the help of the format painter, you can maintain a consistent look in your slideshow. The feature will let you copy formatting (not the content) from one place and paste it to another entity. Just select the source object and use the Format Painter feature to copy it. Now, you can double click the objects to apply the new format.
5. Don’t Neglect Your Textual Content
While most of the people focus on images, sounds, and transitions in a presentation, they forget the things they can do with plain textual content. Just select a textbox and visit Shape Format -> Quick Styles from the toolbar. Here, you can see a wide range of styling features available for it. From Word Art to rotations, and custom styles to shape outlines – there are so many things you can do here. Though, make sure that you don’t overdo it and that the formatting should go well with the rest of the content.
6. Work on Background Styles
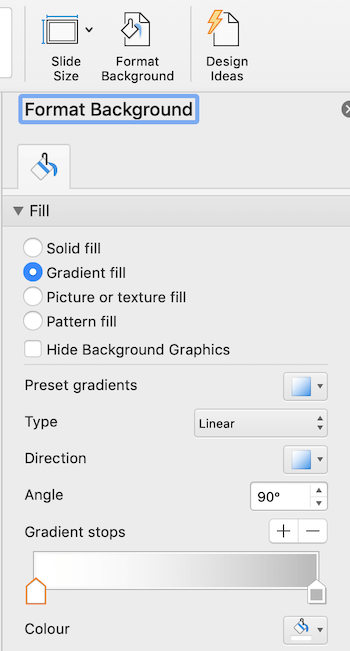
This is one of the most understated PowerPoint design tips that a lot of people ignore. If you want to add a personal touch to your slideshow, focus on its most important thing first – its background. For this, you can go to the Format Background feature under the Design tab and explore it. Apart from selecting inbuilt background styles, you can also import an image as a background.
Furthermore, you can visit the “Format Background” option to play with the image background and various other features to use solid colors. This includes setting custom transparency, gradient fill, etc.
7. Edit Your Pictures without Any Third-party Tool
Just like any other presentation tool, PowerPoint also lets you include pictures and all kinds of graphics. It also provides tons of editing options to customize these pictures. Once you insert an image, go to its Pictures tool to explore these options. You can set its contrast, brightness, recolor it, and do much more. You will also get options to set frames, alignments, and all other kinds of picture effects.
8. Put Pictures in a Shape
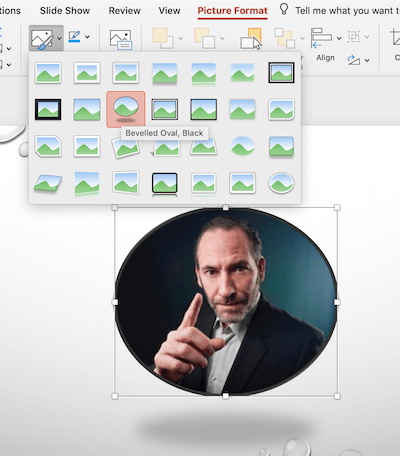
While a lot of people are not aware of these design tips, they will certainly be extremely resourceful. Using PowerPoint, you can align a picture in the form of a shape. Just go to Picture Format>Quick Styles and choose from the available options. There are many options for you to adjust your picture.
9. Create Customized Icons
You might already know that there are tons of third-party sources from where you can access icons for your presentations. You can also go to the Insert > Icons feature from the ribbon to access a wide range of icons for free. Though, if you want, you can create your own icon on PowerPoint as well. Firstly, go to Insert > Shapes to add one or more shapes. Later, select them and go to Shape Format > Merge Shapes and select a preferred option from here to create a unique icon of your choice.
10. Edit Shapes
If you want, you can also create custom shapes for your presentation. Firstly, insert any shape of your choice from the toolbar and select it. Right-click and go to the “Edit Points” feature. Now, you can set custom points to edit the shape the way you like. You can further change its layout, color, and much more.
11. Align All Graphics
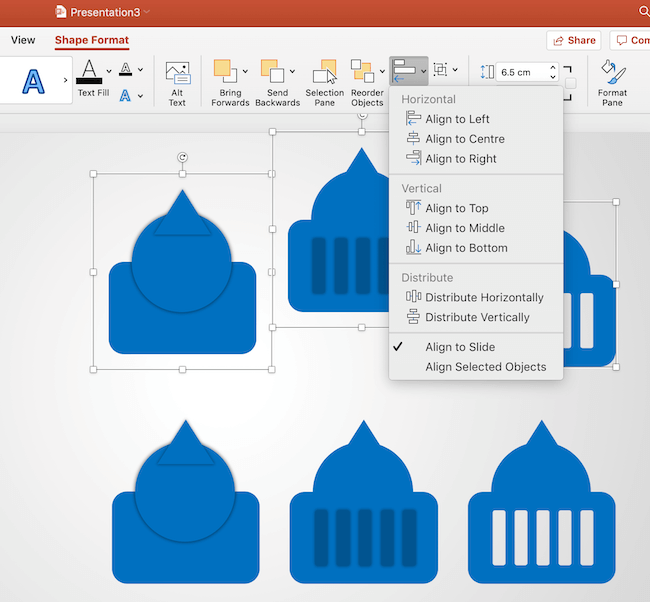
If you have a lot of graphics like images and icons in your slides, then they might clutter your presentation. The quickest way to fix this is by aligning all your graphics together. Since PowerPoint has an inbuilt feature for this, you don’t have to go through any technical jargon to understand it. Just select multiple graphics (by pressing the CTRL key) and go to Shape Format > Align. This will give you different options to align your graphics in a more uniform manner.
12. Combine/Merge/Subtract Multiple Shapes (To Create New Shapes)
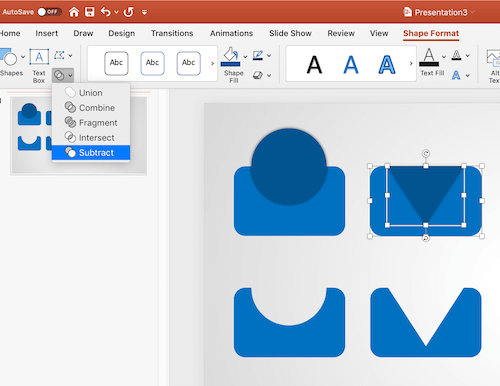
Just like creating customized icons, you can come up with new shapes on PowerPoint as well. All you need to do is insert the shapes of your choice to a slide and select them (by using the CTRL key). Once multiple shapes are selected, go to Drawing Tools > Format > Merge Shape. Here, you can intersect, subtract, add, and do so many things to come up with a new shape.
13. Rotate or Flip a Text Box, Shape, Word Art, or Picture

Just like circular text, there are times when we need to rotate or flip any other textual or visual content to make it look more appealing. This is one of those tips that a lot of people don’t know, yet it would be pretty helpful to many. As of now, PowerPoint allows to rotate or flip text boxes, Word art, pictures, and shapes. To do this, just click on the object and go to the Shape Format tab. From here, click on “Rotate” to get features like Rotate 90 degrees left/right, flip vertical/horizontal, and more options.
14. Use the New Zoom Feature
This feature is only applicable to the latest version of PowerPoint. Under the Insert > Zoom field, you can see three new zoom features – Summary, Section, and Slide Zoom.
The Summary Zoom feature would provide an entire summary of your slideshow with a dedicated table of contents. With the Section or Slide Zoom, you can just move from one section/slide to another. For instance, you can move from slide 1 to 10 directly without going through slides 2 to 9.
15. Create Impressive Infographics Like a Pro!
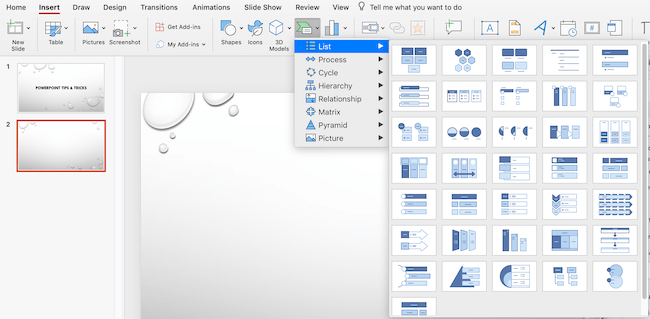
We all know how important infographics and other visual aids are while presenting a complex topic. One of the best tips is related to the SmartArt feature of the tool that helps create impressive infographics on the go. You can go to Insert > SmartArt feature to explore this option. Alternatively, you can just select a piece of information, go to the toolbar, and directly convert it to a SmartArt. You can select the perfect layout for the infographic and later make the needed edits to save time.
17. Change the Text Direction
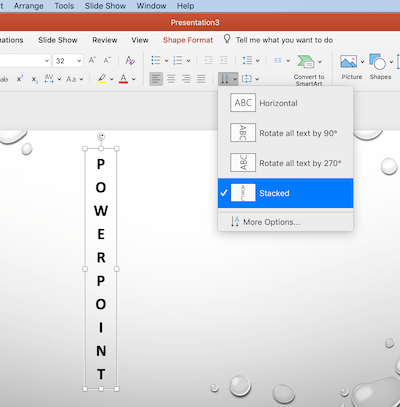
If you really want to stand out from the crowd, then you need to use the tips & tricks that others don’t know. For instance, the Text Direction feature in PowerPoint is seldom used, but can certainly make your textual content highlight. Simply select a textbox and go to the Text Direction option on the toolbar. From here, you can rotate the text in different angles or just stack it to make it look cool!
BE SURE TO CHECK THE SECOND PART: Become PowerPoint Pro #2
BE SURE TO CHECK THE THIRD PART: Become PowerPoint Pro #3
No comments:
Post a Comment