
Fix 1: Mark your Home Network as Private instead of Public
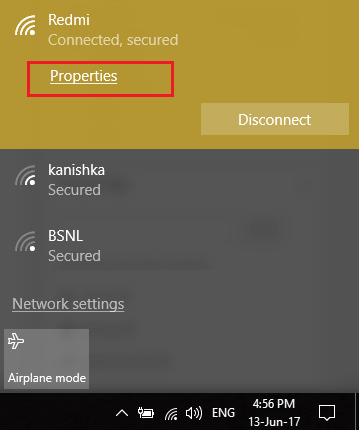
- Go to the System Tray and click on the Wi-Fi icon. Now, you have to again click on the connected Wi-Fi network to open the sub menu and then click Properties.
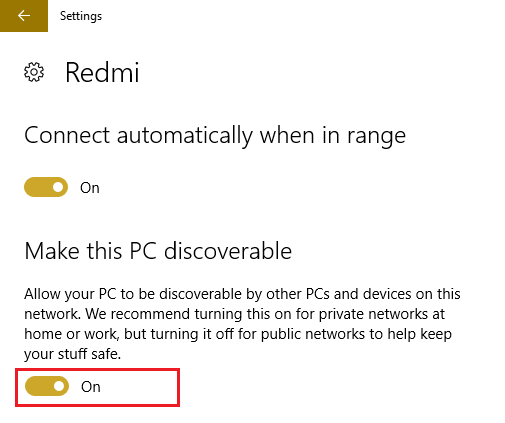
- Turn on the “Make this PC discoverable” option by toggling slider to ON.
- If you are unable to apply the above given steps then go to the system’s search option and type Homegroup.

- Now, again click on the HomeGroup -> Change network location.
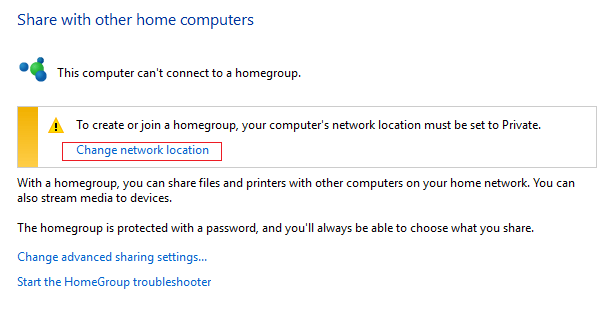
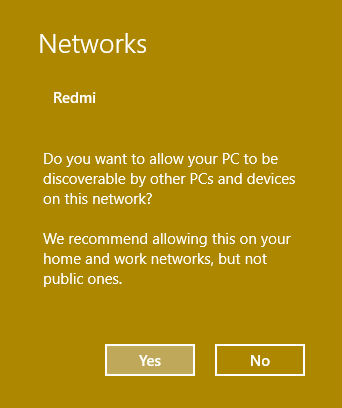
- You have to click on the Yes to make this network a private network.
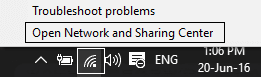
- Again, go to the System tray and Right-Click on the Wi-Fi icon then choose “Open Network and Sharing Center.”
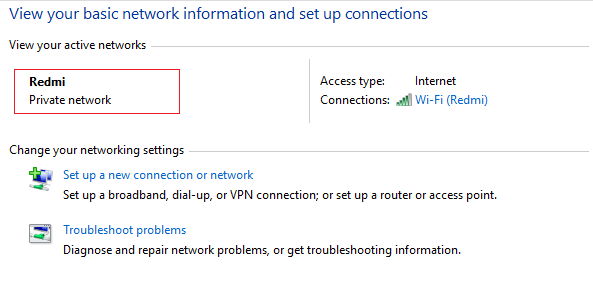
- In this step, you have to verify that the network appeared shows as Private Network then exit from the window
After applying this fix check for the problem, if all OK, then enjoy your internet otherwise go to the next fix.
Fix 2: Reboot Network Adapter
In order to restart the network adopter, follow the below given steps:
- Open the run dialogue box (Press Windows key + R), in the run box type ncpa.pl and click OK
- Now, you have to right-click on your network adapter and choose Disable
- At last, again right-click on your network adapter and Enable it.
Fix 3: Disable WiFi Sense
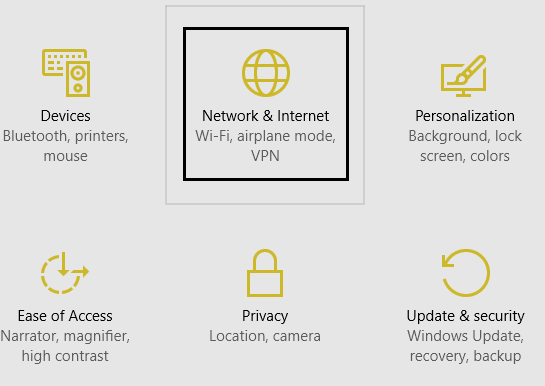
- Open the settings of your system by pressing Windows Key + I then click on the Network & Internet.
- After it, click on the Wi-Fi present in the left pane window and Disable everything under Wi-Fi Sense. It is also suggested to disable Hotspot 2.0 networks and Paid Wi-Fi services.
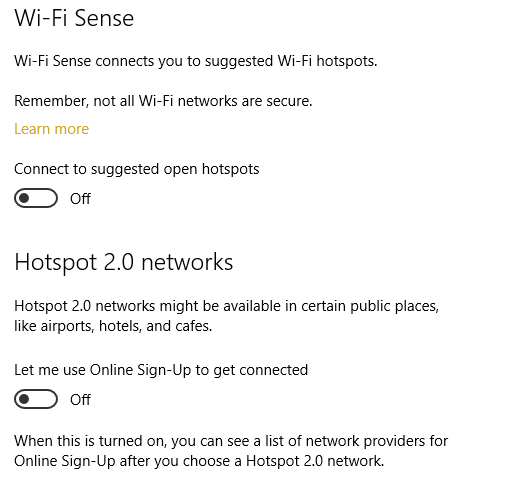
- Now, disconnect the Wi-Fi connection and then reconnect it again.
Check that the WiFi keeps disconnecting issue on Windows 10 issue is solved or not.
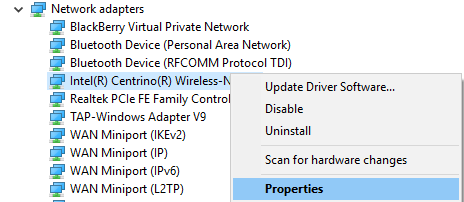
Fix 4: Fix Power Management Issues
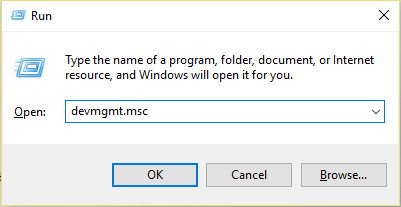
- Open the run box by pressing Windows + R key from the keyboard and then type devmgmt.msc then click on the OK. This will open the Device Manager Window.

- Now, you have to click on the Network adapters to expand it and then right-click on your installed network adapter then go to the Properties.
- Navigate to the Power Management Tab and uncheck “Allow the computer to turn off this device to save power.”
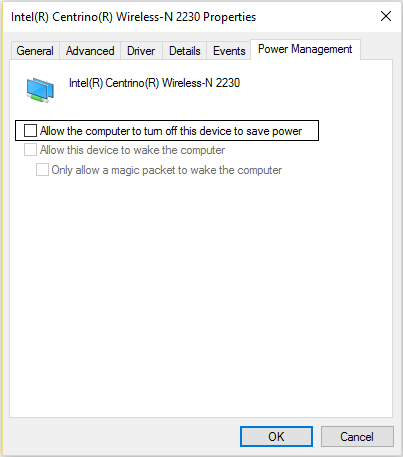
- Now, click Ok and exit from the Device Manager.
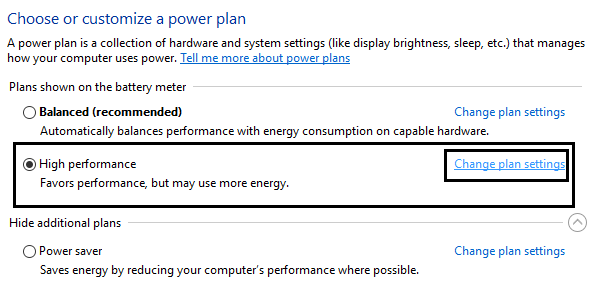
- Press the Windows + I key to open the Settings, then navigate to the Click System > Power & Sleep. At the bottom click Additional power settings.
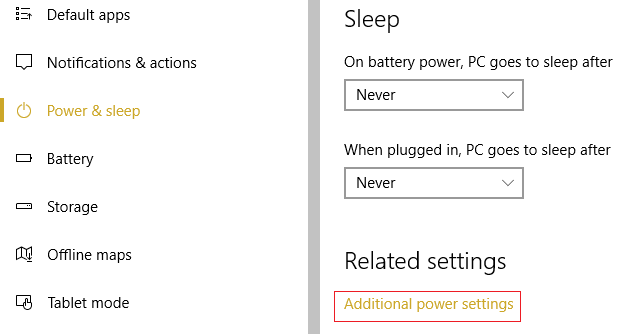
- Click on the “Change plan settings” option present next to the power plan.
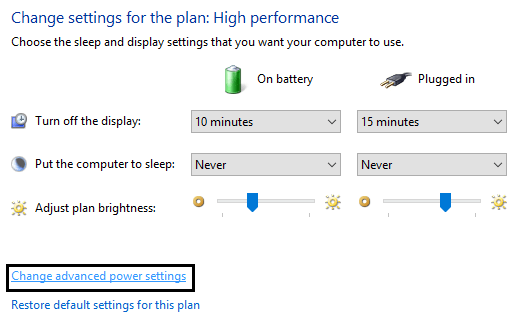
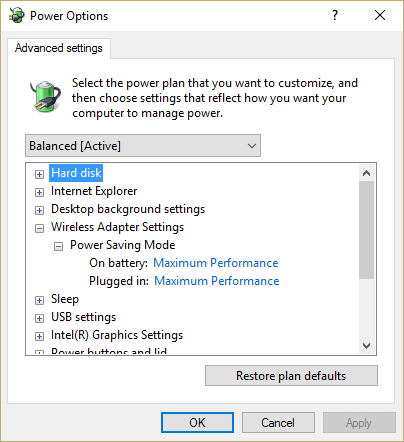
- Now, at the bottom click on the “Change advanced power settings.” Click on the Wireless Adapter Settings to expand it and then again expand Power Saving Mode by clicking on it.
- At last, you have to modify the available two modes, ‘On battery’ and ‘Plugged in’ Change both of them to Maximum Performance.
Fix 5: Try to Update the Wireless Drivers Automatically
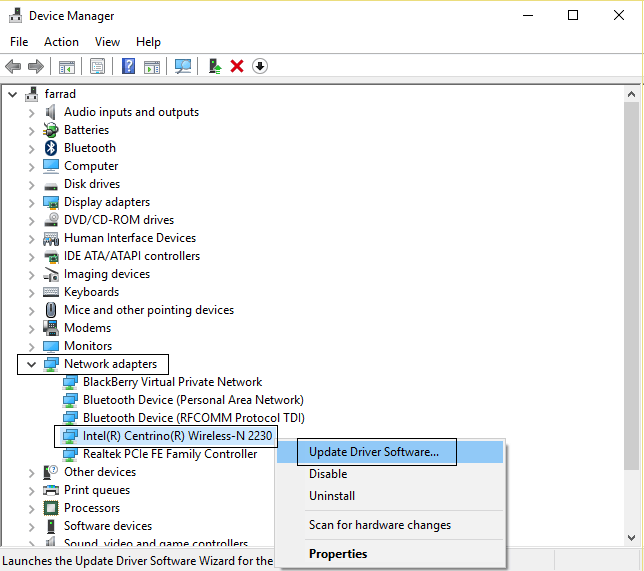
- To do this, you have to again open the device manager window. Open the run dialogue box and type devmgmt.msc then press OK.
- Click on the Network adapters to expand it and then right-click on your installed network adapter and choose Update Driver Software.
- Now, select the Search automatically for updated driver software.
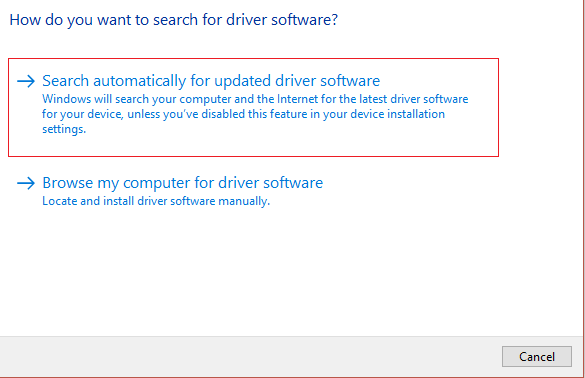
- You have to restart your PC in order to save these modifications.
If you are still facing the issue then follow the below given solution.
- Select ‘Browse my computer for driver software‘ then click ‘Let me pick from a list of device drivers on computer.’
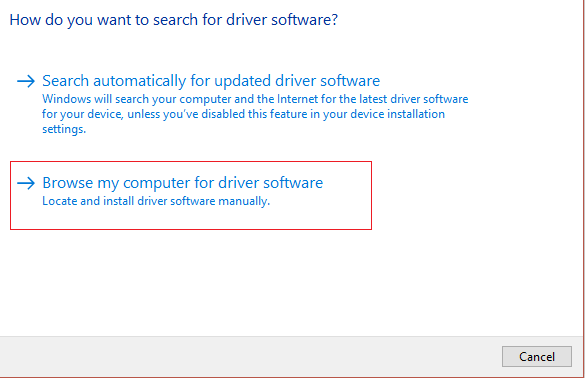
- Choose the updated driver from the list and then click Next.
- Allow your system to install the latest system drivers and after finishing close everything.
- At last, restart your system.
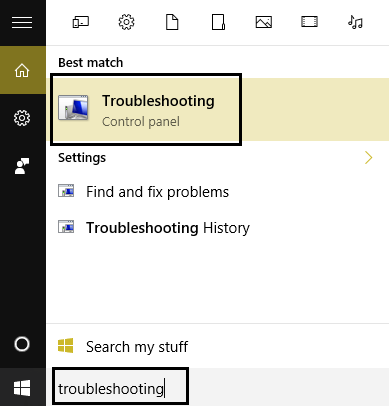
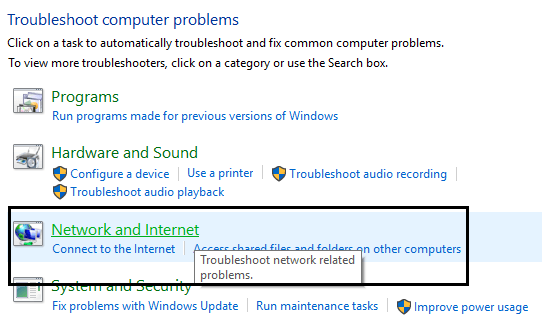
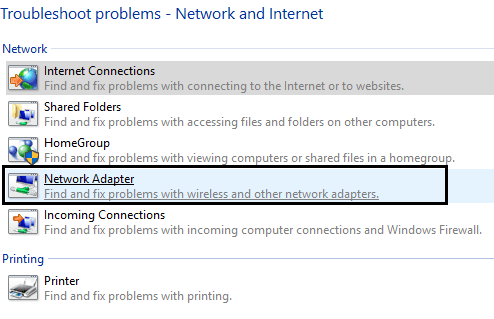
Fix 6: Run Network Troubleshooter
Follow the below-given solution to run the network troubleshooter,
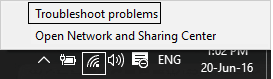
- Find the network icon, right-click on it and choose the Troubleshoot Problems. After it, simply follow the on-screen instructions.
- Press the Windows + W key form your keyboard and then type Troubleshooting then press the Enter key.
- Choose the “Network and Internet” then in another the screen click on the Network Adapter.
- Simply, follow the on-screen instruction to complete this fix.
No comments:
Post a Comment