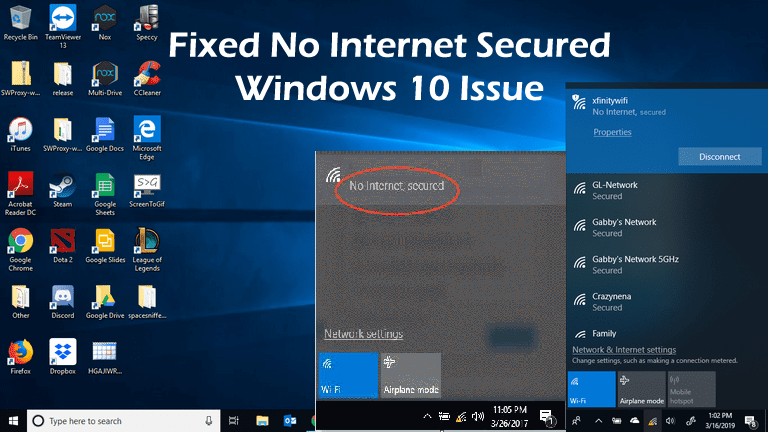
Solution 1: Change Adapter’s Settings
It is estimated changing the adapter settings works for you to fix no internet secured Windows 10 issue.
So follow the steps to do so:
- Open Network settings (click on the Wi-Fi icon available on the taskbar and choose Network settings.)
![]()
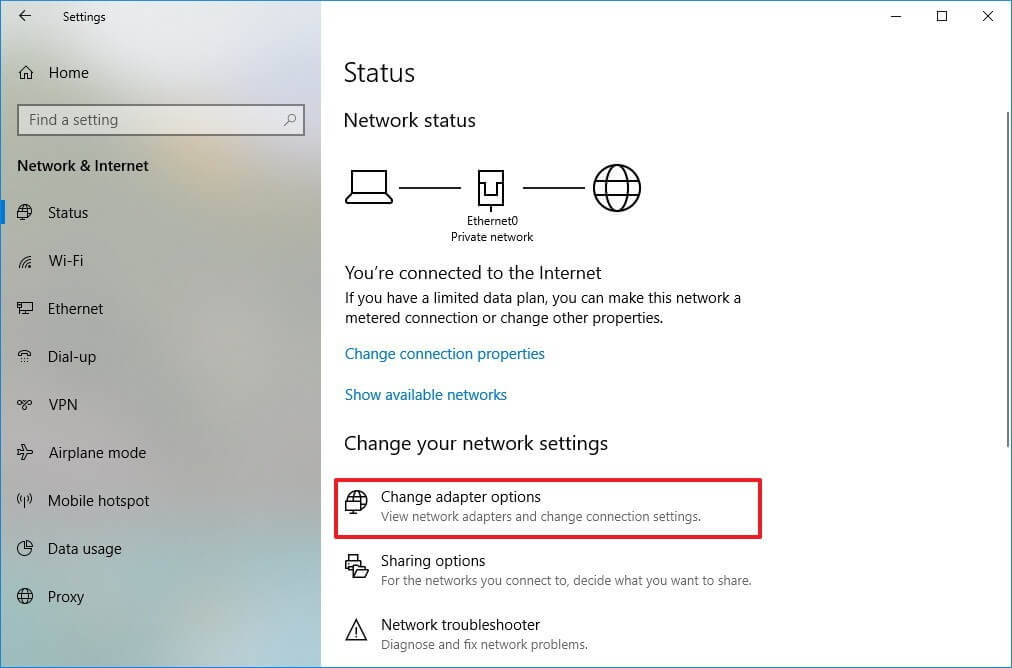
- Search for Change adapter options, this option is generally available at the down of the window so scroll down to find it. After finding click on it.
- Next right-click on wireless network adapter > select Properties from the cascading menu.
- And if the Internet Protocol Version 6 (TCP/IPv6) is under the options then uncheck it for disabling IPv6.
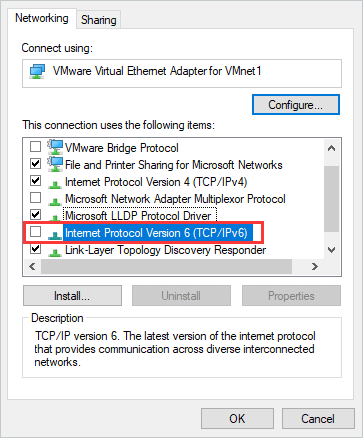
- Click OK and restart the system to let the changes take effect.
Verify if the no internet, secured issue is resolved or not, if not then head to the next solution.
Solution 2: Modify the WiFi Connection Property
In order to modify the properties of the WiFi connection, follow the below-given steps:
- Press Windows + R key > in the run box type ncpa.cpl > hit Enter key.

- You will see the “network connections” window opens.
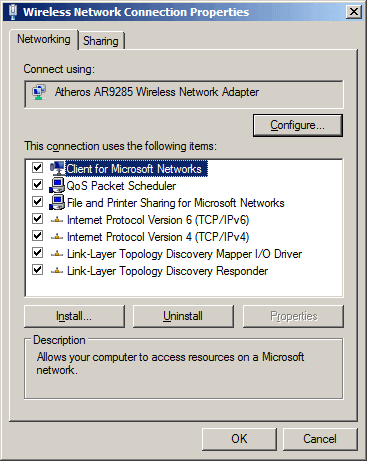
- Select the WiFi connection > then right-click on the WiFi > select “properties.”
- Now make sure that the following options are checked.
- Client for Microsoft networks
- File and printer sharing for Microsoft networks
- Link-layer topology discovery mapper I/O driver
- Internet protocol version 4, or TCP/IPv4
- Internet protocol version 6, or TCP/IPv6
- Link-layer topology discovery responder
- After it, click the network icon > find the WiFi network that shows the error message
- Remove any Ethernet cable connected to your system or laptop
- Turn on the airplane mode on your system and then restart the WiFi router
- When WiFi router is turned on, immediately turn off the airplane mode on your computer
- Now, try to connect to the Wi-Fi connection again.
Well, this solution worked for many users to fix no internet secured, the problem in Windows 10. But if still any page on the web won’t open even after connecting to the internet, then follow the next solution.
Solution 3: Try to Update Wi-Fi Adapter Drivers
Sometimes because of the outdated Wi-Fi driver can generate this type of issue on Windows 10. So it is recommended to make sure that your system’s Wi-Fi adapter diver is updated.
Follow the steps to update the network adapter driver:
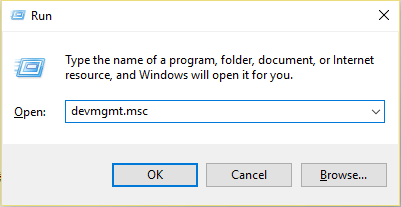
- Press Windows + R key > type “devmgmt.msc” in the run box > hit Enter and device manager window will open.
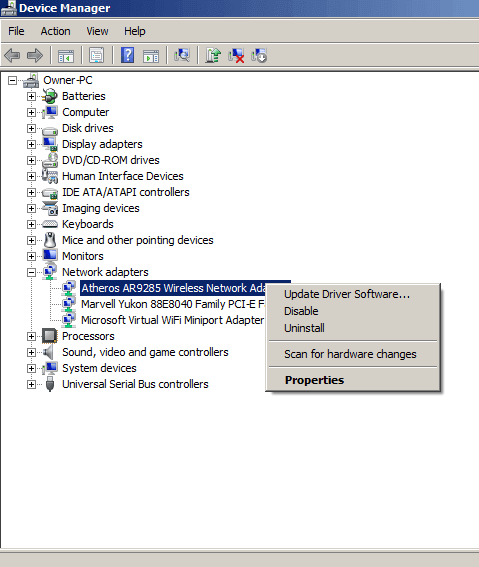
- After it, click on the Network adapters and find the Wi-Fi adapter you are currently using.
- Right-click on it and select Update driver software.
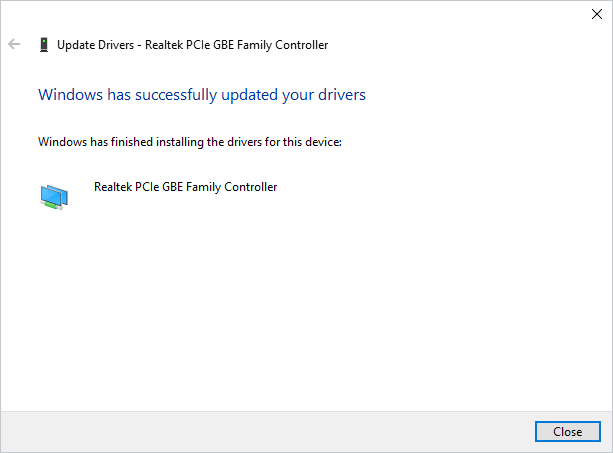
- And in the update driver box > click on search automatically option and the Windows will search for updated driver software
Moreover, you can also update the driver easily by running the Driver Easy, this automatically scans and update the entire system drivers.
Solution 4: Run the Network Troubleshooter
If still encountering the “No Internet, secured” error then here it is suggested to execute the built-in Network Troubleshooter to fix the problem
Follow the below-given steps to do so:
- Go to the search box and type troubleshooting. Choose to troubleshoot from the displayed search results.
- Click on the View all and then click Network Adapter
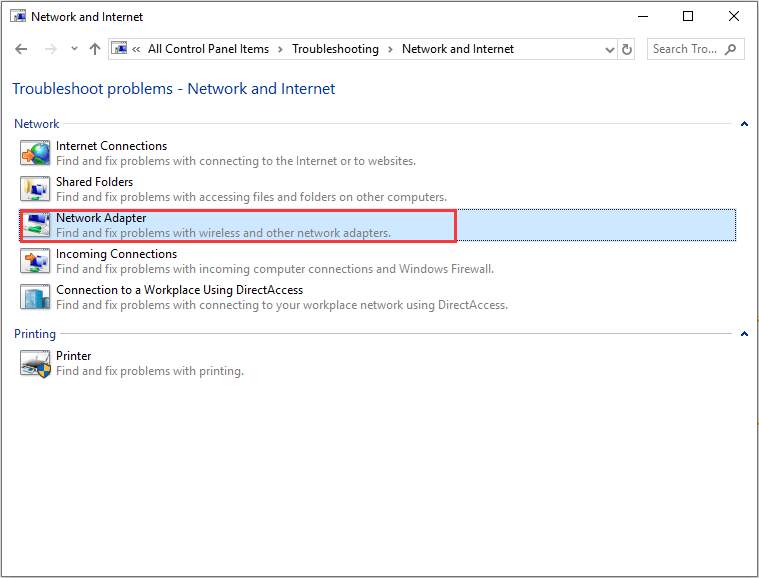
- Now, click on the Next and follow the on-screen instruction to troubleshoot “No Internet Secured” Error in Windows 10.
Solution 5: Change the TCP/IP Properties
If you are still unable to connect to your Internet then you should try to change the TCP/IP properties with the help of below-given steps:
- Press Windows + R key > type “ncpa.cpl” > hit Enter key to open up the “network connections” window.

- Now, find out your WiFi connection, right-click on it and select the “properties”
- Double-click on the Internet protocol 4 or TCP/IPv4 and select “obtain an IP address automatically” and then go to the “obtain DNS server automatically” options
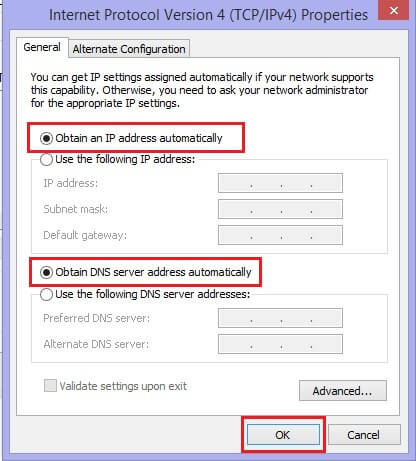
- After it, click on the “advanced” button.
- Then, navigate to the “WINS” tab and scroll down to NetBIOS setting and select “enable NetBIOS over TCP/IP” setting.
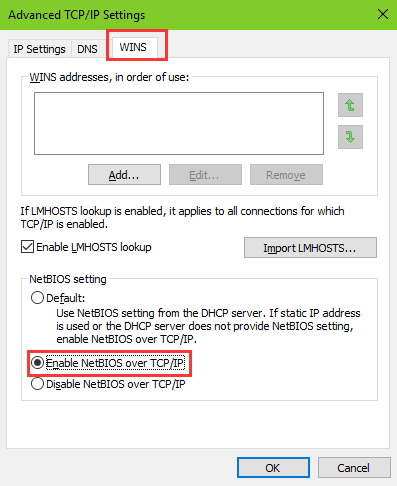
- At last, click on the OK on all the dialog boxes.
Solution 6: Change Power Management Properties
If still encountering the Windows 10 Wi-Fi no internet secured error, then this might be due to the power management settings.
Follow the steps to change power management properties:
- Press Windows + X key > choose device manager > expand network adapters
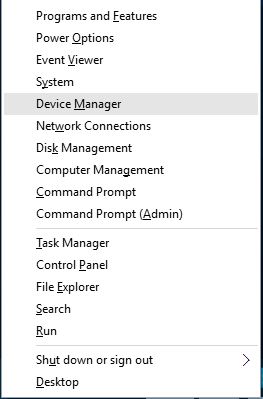
- Double-click your wireless network > go to “power management” tab
- Now uncheck the “Allow the computer to turn off this device to save power” option

- And reboot your computer
Check if you are able to connect to the internet now.
Solution 7: Disable Wi-Fi Sharing Software
This is the last solution that you need to try if none of the above-given fixes work for you. Try to disable Wi-Fi sharing software.
Commonly after installing the Creators update user are struggling with the internet connection not working issue.
Follow the steps to disable wi-fi sharing:
- First open network adapters > right-click on the wireless network you’re using > click “properties”

- Click on “sharing” tab > and uncheck “Microsoft network adapter multiplexor protocol” and the related items to WiFi sharing.
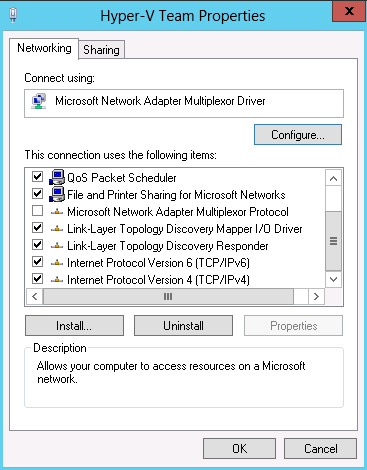
Please Note – To know the items related to sharing > click on each item and below > you’ll get a description of its purpose. And based on this description > select the items you needed to uncheck
- Lastly, close “out of network adapters” > try connecting to the Internet
It is estimated after following the above-given fixes you are able to get rid of the no internet secured issue.

No comments:
Post a Comment