

How to Enable System Restore
For many people, System Restore protection is turned on by default for your main system drive (C:) and not other drives on your PC. For others, System Restore is not enabled by default for any drives. Right now, there’s no consensus for why this happens. It does not appear related to whether Windows was installed fresh or upgraded, how much disk space you have available, what type of drives you have, or anything else we can figure out.
If you want to be protected by System Restore, you should absolutely turn it on for at least your system drive. In most cases, that’s all you need, since all the things System Restore protects tend to be located on the system drive anyway. If you want to turn on System Restore protection for other drives–say, for example, you install some programs to a different drive–you can do that too.
To make sure System Restore is turned on–and to enable it for specific drives–hit Start, type “restore,” and then click “Create a restore point.” Don’t worry. This doesn’t actually create a restore point; it just opens the dialog where you can get to all the System Restore options.

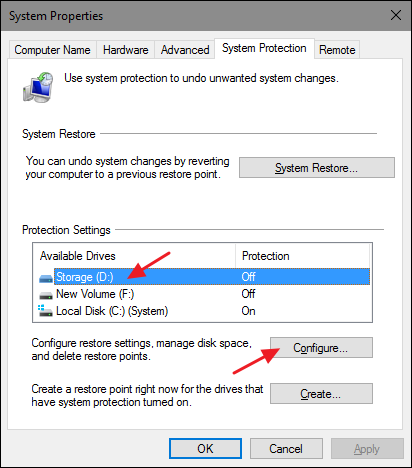
On the “System Protection” tab, in the “Protection Settings” section, you’ll see the available drives on your PC and whether protection is enabled for each drive. To turn on protection, select a drive on the list and click the “Configure” button.
(In our case, System Restore was already enabled for our C: drive. If it isn’t on your system, that’s the first drive you’ll probably want to enable it for.)
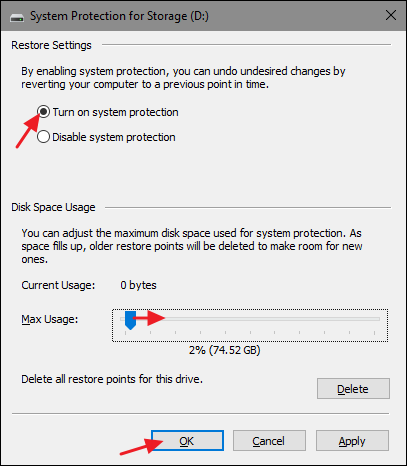
In the “System Protection” dialog that opens, click the “Turn on system protection” option, adjust the “Max Usage” slider to the amount of hard drive space you want System Restore to be able to use, and then click “OK.”
You can then click “OK” again to exit the System Properties dialog. Just be aware that when Windows creates a restore point (or you create one manually), System Restore will create a restore point on all the drives that have system protection enabled.
How to Create a Restore Point
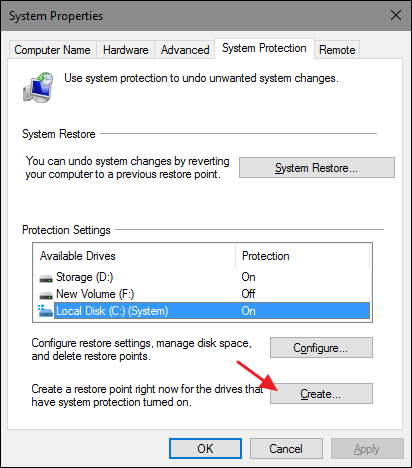
As we mentioned earlier, System Restore automatically creates restore points on a week, and whenever a major event like an application or driver installation happens. You can also create a restore point yourself whenever you want. Hit Start, type “restore,” and then click “Create a restore point.” On the “System Protection” tab, click the “Create” button.
Type a description for your restore point that will help you remember why you created it and then click “Create.”

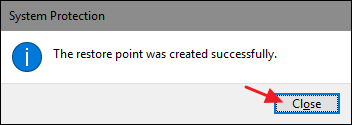
It can take 30 seconds or so to create a restore point, and System Restore will let you know when it’s done. Click “Close.”
How to Restore Your System to an Earlier Restore Point
Okay, so you have System Restore enabled, and you’ve been diligent about creating restore points whenever you mess with your system. Then, one fateful day, the inevitable happens–something goes wonky with your system, and you want to restore to an earlier restore point.
You’ll start the restore process from the same “System Protection” tab where you configure System Restore options. Hit Start, type “restore,” and then click “Create a restore point.” On the “System Protection” tab, click the “System Restore” button.

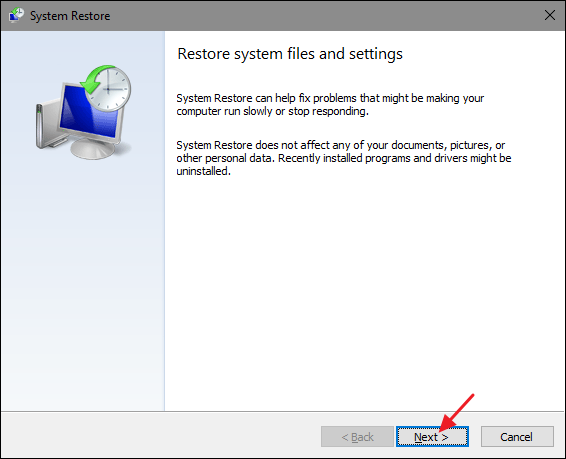
The welcome page of the System Restore wizard just gives you a brief description of the process. Click “Next” to go on.
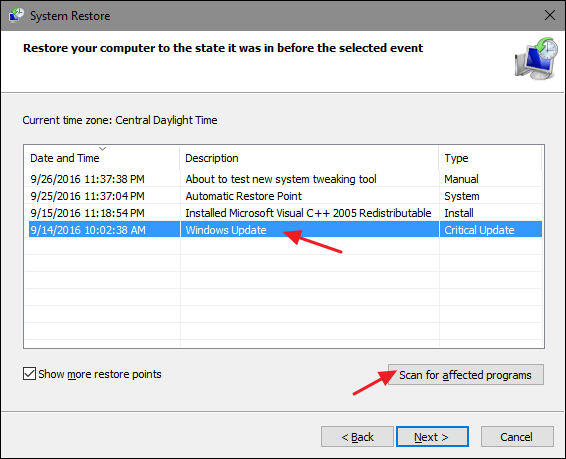
The next page shows you the available restore points. By default, the only thing showing will probably be the automatic weekly restore point and any manual restore points you’ve created. Select the “Show more restore points” option to see any automatic restore points created before app or driver installations.
Select the restore point you want–remember, the most recent working restore point is ideal–and then click “Scan for affected programs” to have System Restore detect any programs that will be uninstalled during the process.
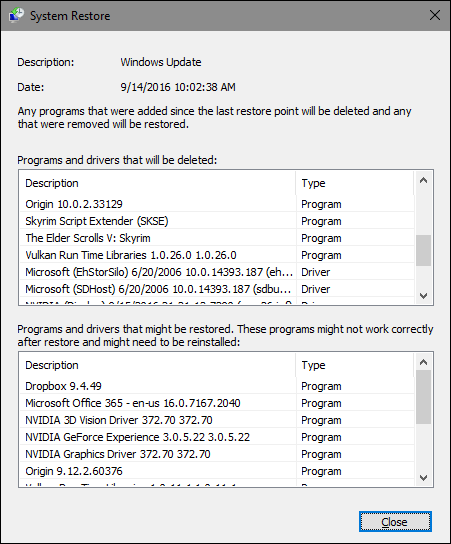
System Restore will present you with two lists. The top list shows you programs and drivers that will be deleted if you restore Windows to the selected restore point. The bottom list shows programs and drivers that might be restored by the process. Again, even programs and drivers that get restored might not function properly until you do a full reinstall.
When you’re ready to restore, click the restore point you want to use and then click Next. Note that you can skip the scanning step and just click Next anyway, but it’s always good to see what apps will be affected before you start the process.

Next, you’re asked to confirm the restoration. Make sure you’ve selected the right restore point and click “Finish.”
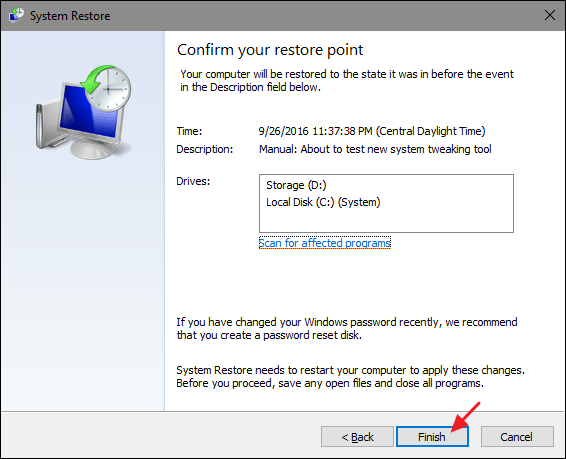
System Restore informs you that once it starts, the restore process cannot be interrupted. Click “Yes” to start.

Windows will restart your PC and begin the restore process. It can take a while for System Restore to reinstate all those files–plan for at least 15 minutes, possibly more–but when your PC comes back up, you’ll be running at your selected restore point. It’s now time to test whether it resolved whatever problems you were having. And remember that System Restore creates an additional restore point right before performing the restore process, so you can always undo your actions by performing this same process and selecting that new restore point.
No comments:
Post a Comment