
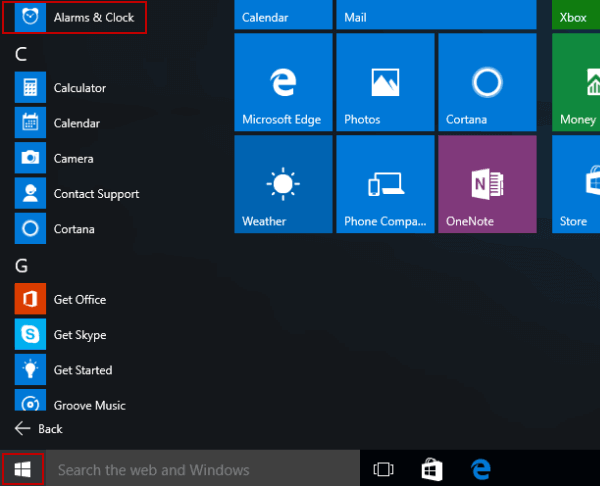
Step 1: Click the Start button, open All apps in the Start Menu, and choose Alarms & Clock.
Step 2: In the Alarm settings, tap the existing alarm to continue.

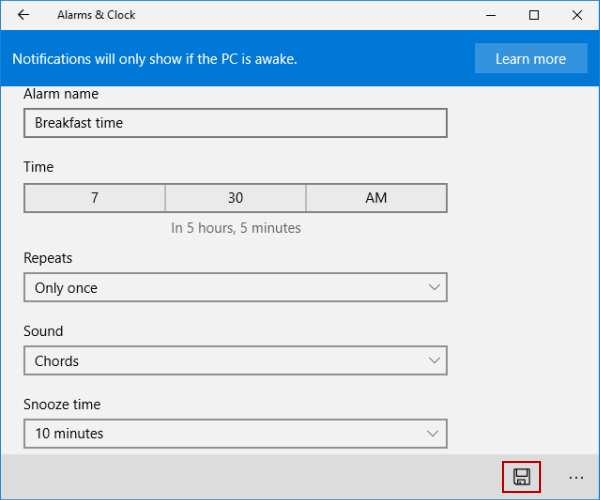
Step 3: Edit the alarm's name, time, sound, repeat times and snooze time, and then hit the bottom-right Save icon.
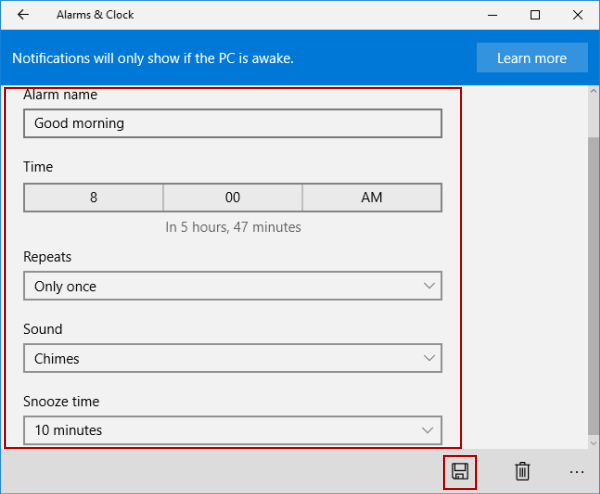
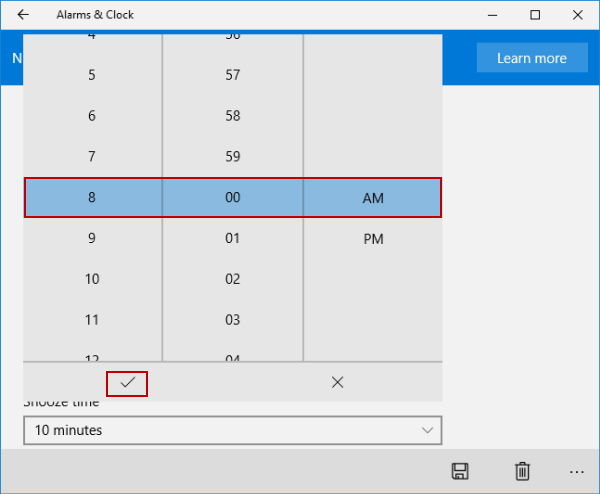
For example, to change the time, click the bar under Time, set new time and tap the tick icon.
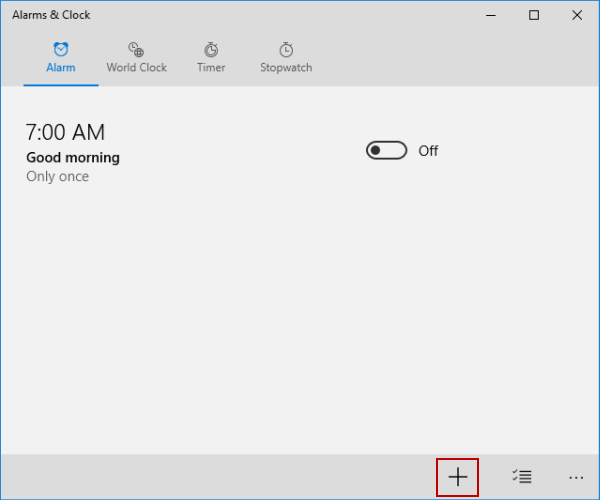
Add alarm
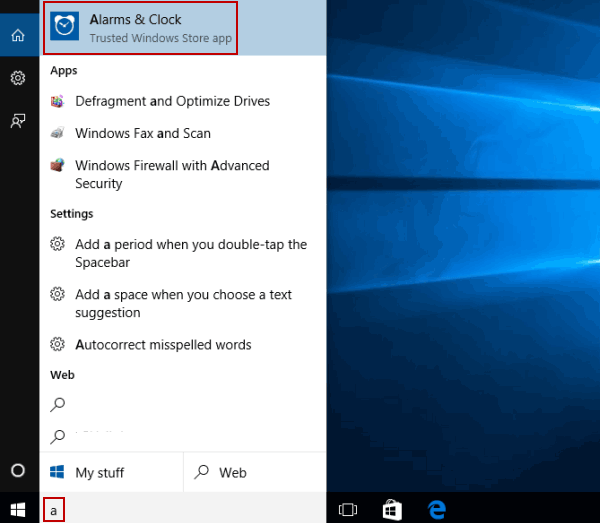
Step 1: Type a in the search box on taskbar, and select Alarms & Clock from the list.
Step 2: In the Alarm settings, click the plus sign (i.e. the New icon) on the bottom-right corner.
Step 3: Edit the new alarm and tap the lower-right Save icon.
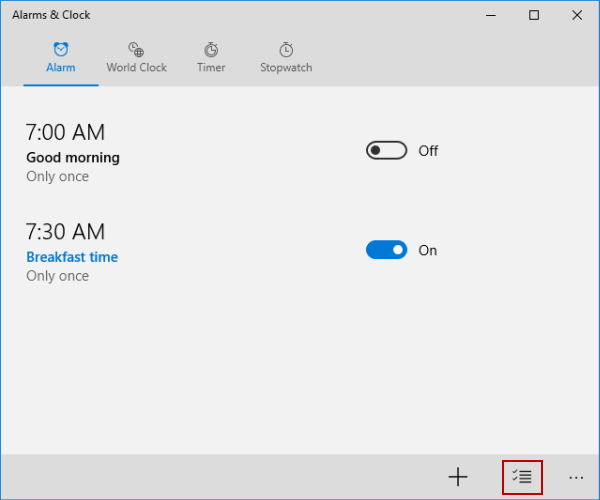
Delete alarm
Step 1: Open Alarms & Clock from the Start Menu.
Step 2: Hit the Manage icon on the bottom right.
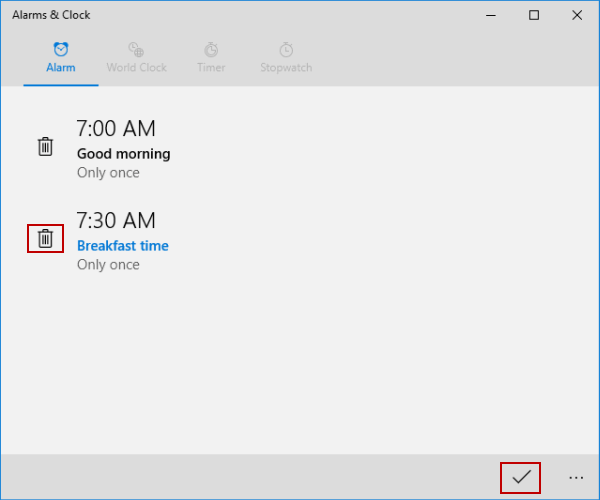
Step 3: Click the Delete icon on the left of the alarm you want to remove, and tap the lower-right tick icon (i.e. the Done button).
No comments:
Post a Comment