
1. Make sure cool air can reach your computer
Before we get to your computer’s internals, make sure you’ve placed your computer in a location that helps it cool down.
Place your desktop (or laptop) computer on a smooth, flat surface, such as a desk or even the floor. Don’t put it on a carpeted surface, and don’t keep it inside a drawer or cabinet — you want cool air to be able to circulate around your computer. You need to give the hot air inside your PC somewhere to go as your fans spin to remove it.
The same principle applies to your laptop. Use a laptop on a desk or a table, and if you must put it on your lap, try and limit the time it sits there. You can also use a laptop cooling platform, which should have a built-in fan to blow cool air up toward your laptop. Cooling pads also let you use your laptop on your lap without worrying about overheating. Just don’t leave your laptop out in the sun for too long, because that will make it heat up fast!
Your laptop or PC casing should have little rubber “feet” on the bottom, which allow for a bit of space between the casing and the surface your PC is sitting on. That gap is essential for allowing your computer to dissipate heat, so if the feet have worn down or fallen off, replace them.
2. Clean your fans and vents
A loud computer fan is often a dusty computer fan. As dust builds up, it prevents the fans from cooling your computer’s sensitive internal components as effectively as they should. Regularly remove dust from the fans and vents to allow your computer to cool itself efficiently.
Before cleaning your computer, turn it off and unplug all cables and connections, especially the power cable.
Pick up a compressed air duster — also known as canned air — and spray it toward your computer’s vents at an angle. Your goal is to blow the dust away, and not back inside your computer’s housing.
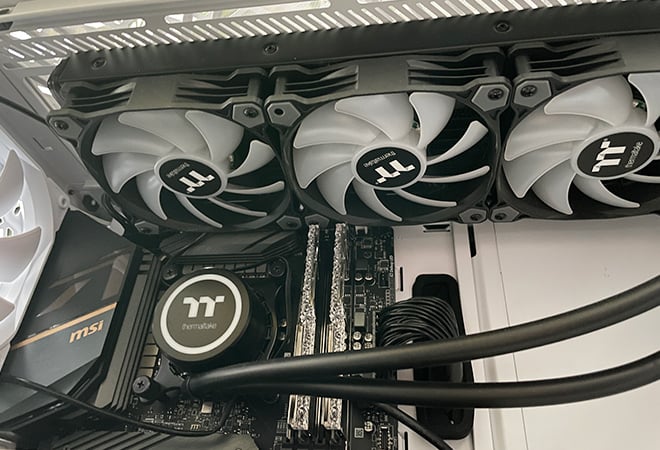
If you can, open up your computer to directly clean your CPU fan. If you have a desktop, you may find other fans inside as well, such as for your RAM or GPU. To remove any dust build-up, spray the fans in short bursts with your canned air, then wipe down the fans with a microfiber cloth to finish the job. If your desktop computer has a dust filter inside, clean this out as well.
While you’re at it, clean your power supply fan with the same combo of compressed air and a microfiber cloth. Power supply fans also get loud if they’re too dusty to work properly. Do not open your power supply, but clean it as best you can from the outside.
Finally, inspect the thermal paste on your CPU and any other units that have some. Thermal paste helps your CPU and GPU transfer heat to their heat sinks, and this paste can wear down over time, becoming less effective. If you notice any aging or worn down thermal paste, replace it.
Before closing up your computer, double-check that you’ve plugged all your fans back into the motherboard — otherwise, they won’t work at all.
3. Check that your fans are working properly (or replace them)
Now that your computer fans are nice and clean, put everything back together and turn on your computer. You’re looking to see whether the fans start up and spin normally. If so, then you’ve done a great job — just be sure to monitor your CPU and GPU temperatures for a while to make sure everything’s working normally.
But, if your computer fans are still making noise, or if they don’t work at all, it may be time to replace them. Check and confirm your fans’ dimensions before ordering new ones, or else you may be stuck with shiny new fans that don’t fit inside your PC.
While you can replace most fans individually, if your power supply fan doesn’t work, replace the entire power supply unit. Cracking open the power supply can be dangerous. Also, an overheating power supply may be unable to sufficiently power all the components in your computer. So rather than replace the fan, upgrade to a more powerful power supply instead.
No comments:
Post a Comment