
Here are seven Windows 10 to help you start flying through Windows
1.How to start in Safe Mode in Windows 10
If you've used Windows for long enough, your muscle memory probably takes you straight to the F8 key when you want to interrupt startup and troubleshoot a problem in Safe Mode.
On modern hardware running Windows 10, however, that shortcut doesn't work. Instead, you need to use one of these alternative paths to start the Windows Recovery Environment (WinRE), where Safe Mode is an option.
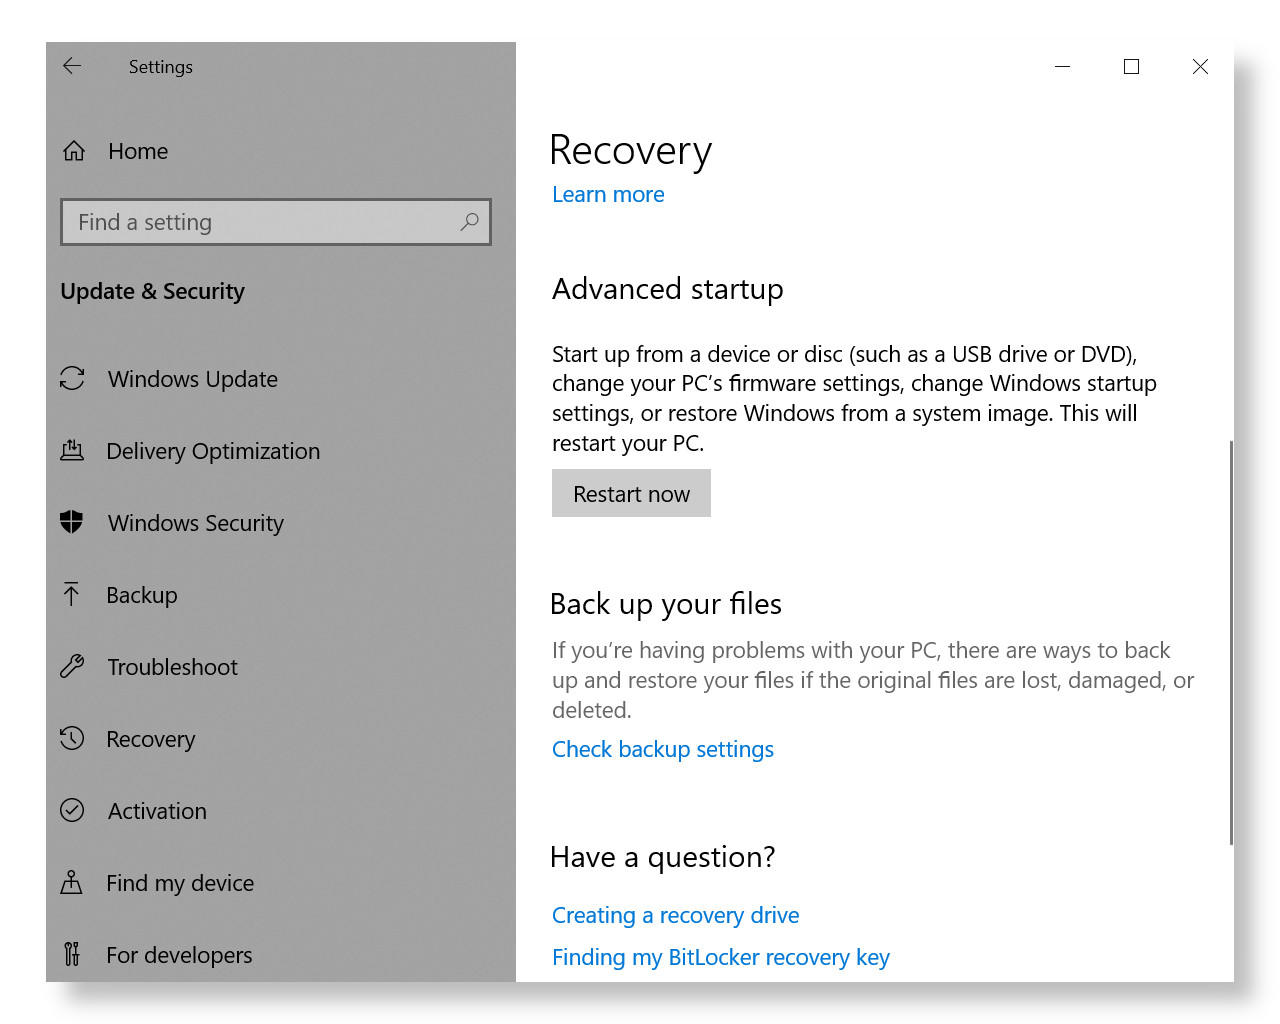
- Is Windows already running? Go to Settings > Update & Security > Recovery, and then click Restart Now under the Advanced Startup heading (Figure A).
- Windows won't start but you can get to the sign-in screen? Click the Power icon in the lower right corner and then hold down Shift as you click Restart.
- Windows crashes too early to allow either of those options? Use the PC's power switch to restart. After three failed boot attempts, WinRE starts automatically.
Figure A
From the WinRE options menu, click Troubleshoot > Advanced Options > Startup Settings. From that screen, click Restart to display the classic startup menu with three entries for Safe Mode, including options for Safe Mode with Networking and Safe Mode with Command Prompt.
2.How to create a custom Documents library for faster searches in Windows 10
Even the most organized individual can have trouble keeping track of files that are scattered across multiple locations, especially when your filing system includes multiple local drives (such as a Documents folder on the system drive and an Archive folder on an external drive) as well as folders on cloud services that you share with co-workers or family and friends.
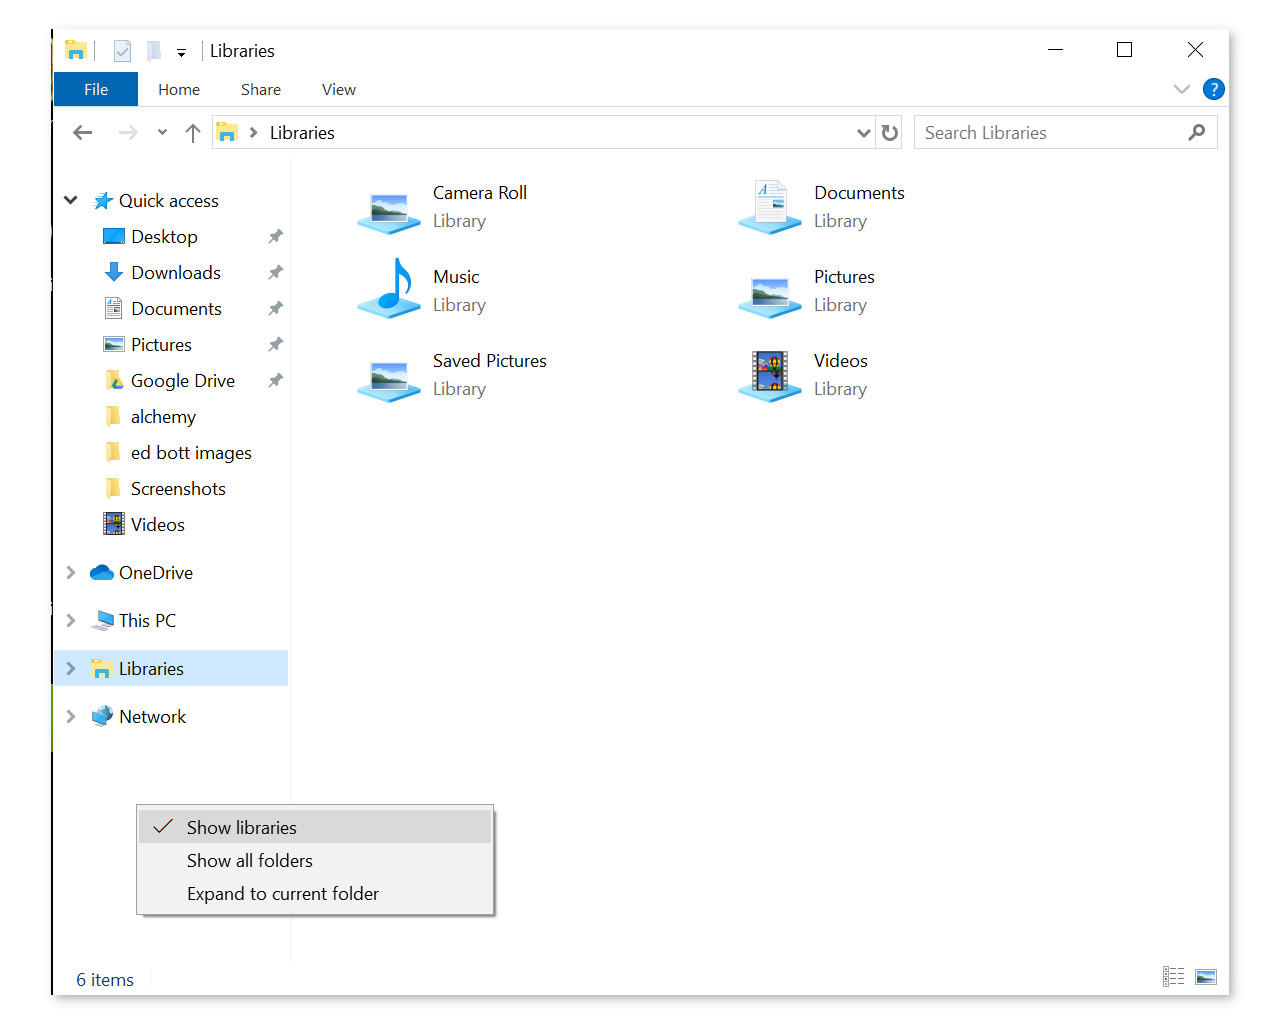
To bring all those files together into a single virtual folder that you can search at one time, use a Windows library. If the Libraries heading isn't visible in File Explorer, right-click the navigation pane and click Show Libraries (Figure D).
Figure D
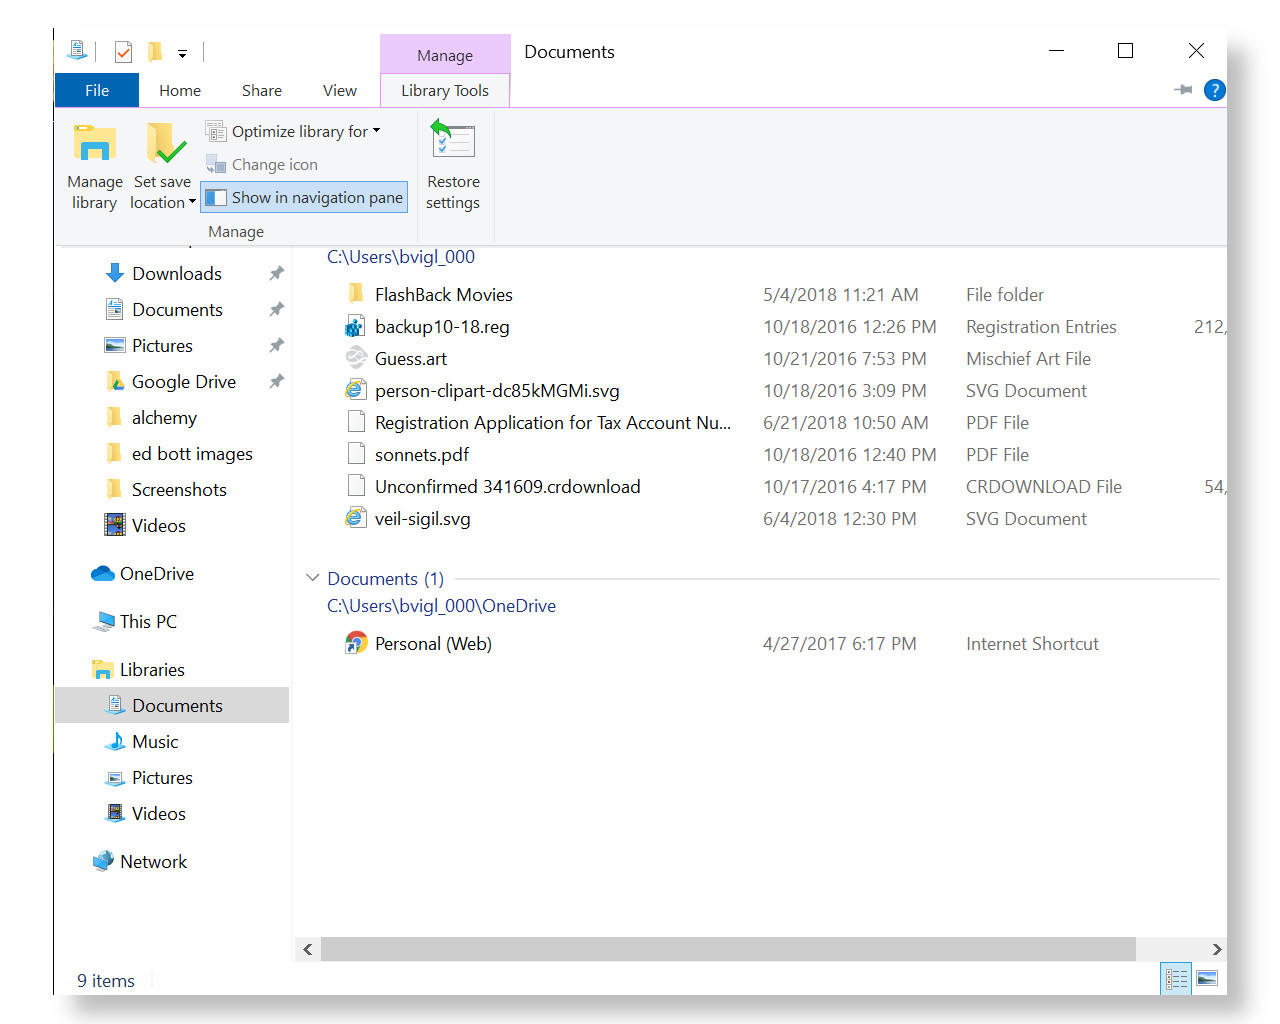
You can right-click and use the New menu to create a new library from scratch. Or use one of the four default libraries that are automatically created for each user account. In File Explorer, click the Documents icon under the Libraries heading to display the library's content; then click Manage Library on the Library Tools tab. Use the Add and Remove buttons to specify which folders are included in the library (Figure E).
Figure E
Opening the Documents library in File Explorer gives you a unified view of all those files, which you can browse, sort, filter, and, most importantly, search just as if they were all neatly stored in the same folder. When you use the search box from a library, your search results come from all library locations. But because a library is a virtual folder, the folders themselves remain in their correct location, and any changes you make are saved exactly where they should be.
3.How to use the Whoami command to get details about your user account
"Who am I?" is a philosophy question designed for late-night debates in college dorm rooms. Whoami, on the other hand, is an obscure but extremely useful Windows command.
When you run the whoami command at a Windows command prompt without any switches, you get the barest of details: your current domain and user name, in the form domain\username (if you're signed in with a local account or a Microsoft account, domain shows your computer name).
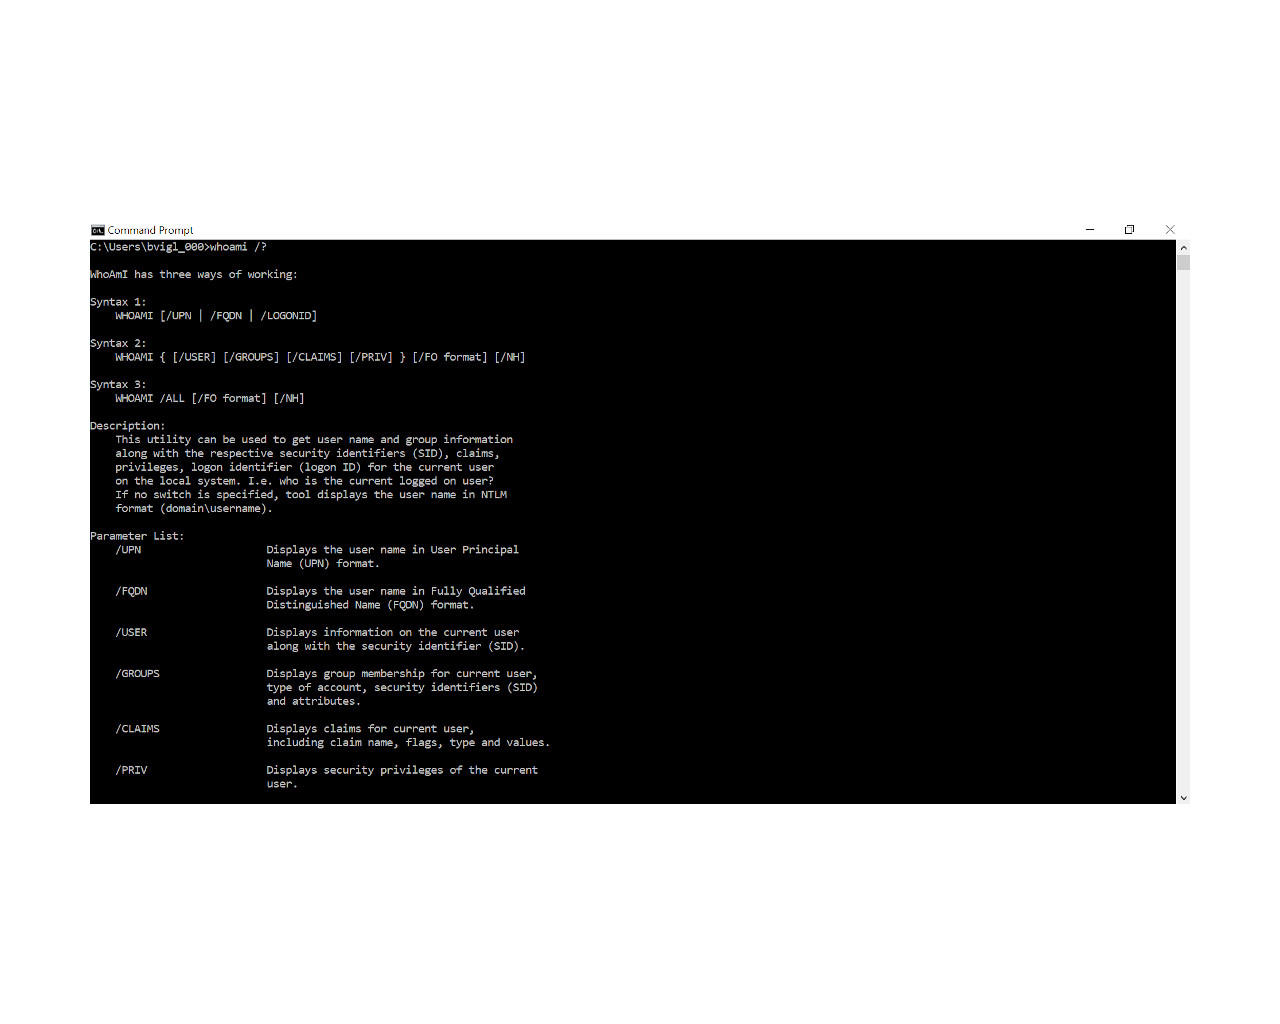
Tack the /? switch to the end of the command to see options for displaying and formatting additional information about the user account that's currently signed in (Figure H). For the most complete display, use whoami /all /fo list, which displays the security identifier (SID) for the current user, along with information about group memberships and privileges.
Figure H
The /fo list switch changes the default display from table (which can be hard to read) to a neatly formatted list. Use /fo csv switch to change the output to comma-separated values, which you can import into a spreadsheet.
4.How to set up a Windows 10 PIN
Strong, hard-to-guess passwords are essential for securing online accounts, but typing a long string of letters, numbers, and symbols can feel like a burden when signing in to a PC using that account. For devices running Windows 10 that are connected with a Microsoft account or Azure Active Directory, you can set a PIN as an alternative to your password. Signing in with a device-specific PIN grants you quick access but still keep your system safe from intruders and, as a bonus, prevents "shoulder surfers" from stealing your online credentials as you type.
To add, remove, or change a PIN, go to Settings > Accounts > Sign-in Options and click Windows Hello PIN (Figure J).
Figure J

For extra security, consider using extra digits instead of the default four. A Windows Hello PIN can be up to 127 characters long. You can also include characters and symbols instead of just numbers; that option allows you to use a PIN as a device-specific password that unlocks your Microsoft or Azure AD account.
You can always switch between PIN and password by clicking or tapping the Sign-In Options link on the screen where you enter your credentials.
No comments:
Post a Comment