
If Windows isn’t starting properly, you can often use the integrated “startup repair” tool to fix it. This recovery tool will scan your PC for problems like missing or damaged system files. It can’t fix hardware issues or Windows installation problems, but it’s a great first place to start if you’re experiencing trouble booting into Windows.
This tool is available on Windows 7, 8, and 10. You can access it from the built-in Windows recovery tools (if they built properly), recovery media, or a Windows installation disc.
Launch Startup Repair From the Windows Boot Menu
On Windows 8 or 10, you’ll often see the advanced boot options menu if Windows can’t boot properly. You can access Startup Repair by clicking Troubleshoot > Advanced Options > Startup Repair on this menu.
Windows will ask you for your password and attempt to automatically repair your PC.

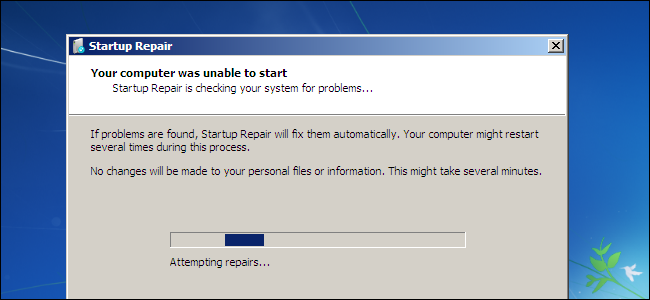
On Windows 7, you’ll often see the Windows Error Recovery screen if Windows can’t boot properly. Select “Launch Startup repair (Recommended)” on this screen to run startup repair.
Windows will prompt you for your keyboard layout and a username and password for your PC. After it does, select the “Launch Startup Repair (recommended)” option. Windows will attempt to find and fix problems that can prevent your PC from booting.

If Windows 7 won’t boot properly and doesn’t show you the Error Recovery screen, you can get into it manually. First, power the computer completely down. Next, turn it on and keep pressing the F8 key as it boots. You’ll see the Advanced Boot Options screen, which is where you would launch Safe Mode from. Select “Repair Your Computer” and run startup repair.

In some cases, the startup repair option in Windows 7 may not be available. You may be told you need to use a Windows installation disc to repair your computer instead.

Launch Startup Repair From a System Repair Disc or Recovery Drive
If Windows isn’t booting properly and won’t even allow you to use the startup repair option at boot, you can run startup repair from a system repair disc or recovery drive.
If you haven’t already created a system repair disc or recovery drive, you can do so from another computer running the same version of Windows that isn’t booting properly. For example, if your Windows 7 PC isn’t booting properly, you can create a recovery disc on another PC running Windows 7 and use it to fix the problem.
Windows 7 only allows you to create a recovery disc by burning a CD or DVD. Windows 8 and 10 allow you to create a USB recovery drive or burn a recovery disc, whichever you prefer.

Once you’ve created a system repair disc or recovery drive, insert it into the PC that isn’t booting properly and boot from the disc or USB drive. You’ll be prompted to choose an installed version of Windows and you’ll see the same tools you could normally access from the boot menu. Select “Startup Repair” to run a startup repair operation.
This recovery media will also allow you to use System Restore, recover your computer using a system image backup you’ve previously created, and run a Windows Memory Diagnostic to check your computer’s RAM for problems.

Launch Startup Repair From Windows Installation Media
You can also also do this right from a Windows installation disc or USB drive.
If you don’t have Windows installation media lying around, you can download a Windows 7, 8, or 10 ISO from Microsoft and either burn it to disc or copy it to a USB drive. It’s completely legal.
Be sure to use media that matches the version of Windows you’re trying to recover—for example, Windows 10 installation media for a Windows 10 PC or Windows 7 installation media for a Windows 7 PC.
Insert the disc or USB drive into the computer that can’t boot properly and boot from the device.
No comments:
Post a Comment