Disable Auto-Reboot Using Group Policy Editor
There are two ways to disable the automated reboot of the computer using the Group Policy Editor.
Enable the Configure Automatic Updates Policy
- Press the Windows Key + R to launch Run, and then type:
gpedit.msc - This will open Local Group Policy Editor. Navigate to the following through the left pane:
Computer Configuration –> Administrative Templates –> Windows Components –> Windows Update - Open Configure Automatic Updates.
- Select Enabled, click on Apply and then OK.

- Now navigate to the Windows Updates tab by opening up the Start Menu and clicking on the Settings (Gear) Icon. Click on Update & Security, then select Windows Update.
 In this window, you may now notice the sentence at the stop stating Some settings are managed by your organization. This means that the group policy we had previously set has been applied. You may now click Check for Updates and the updates will be installed, but only apply when you click Install Now.
 - Just click Install Now when you are ready to reboot your computer.
Enable the No Auto-Restart Policy
- Press the Windows Key + R to launch Run, and then type:
gpedit.msc - This will open Local Group Policy Editor. Navigate to the following through the left pane:
Computer Configuration -> Administrative Templates -> Windows Components -> Windows Update - In the right pane, double-click the No auto-restart with logged on users for scheduled automatic update installations.

- In the pop-up window, select Enabled end then click Apply and OK.
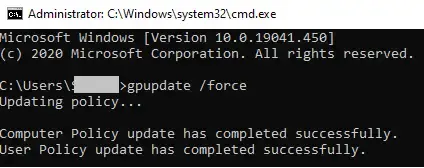
- To make these changes take effect without restarting the computer, open up the Command Prompt by pressing the Windows Key + R to launch Run, and then type in cmd and press Enter.
- Enter the following command in the Command Prompt:
gpupdate /force
Disable Auto-Reboot Using Registry Editor
This method involves altering the Windows Registry. It is recommended that you backup your Registry settings before making any changes. This method is beneficial for power users who want to automate the process of disabling automatic Windows restart.
- Launch the Registry Editor by pressing the Windows Key + R to open Run. Type in the following and then press Enter:
regedit - In the left pane, navigate to the following location:
HKEY_Local_Machine –> Software –> Policies –> Microsoft –> Windows - Right-click on Windows, expand New, and then click on Key.

- Type in WindowsUpdate as the new folder name. Then right-click Windows Update, expand New, and then click on Key. Type in AU as the new folder name. Here is the new and correct registry key structure for your help:

- Now click on the AU key in the left-pane and right-click the blank space in the right pane. Expand New and then select DWORD (32-Bit) Value.

- Name the new DWORD as NoAutoRebootWithLoggedOnUsers. Double-click the new DWORD which you have just created and set the Value Data as 1. Click Ok.

This will disable automatic Windows 10 restart when a user is logged on to the computer.
Disable Auto-Reboot using the Task Scheduler
By default, Windows 10 is bound to reboot after it has downloaded and installed Windows Updates. This is a task which is already scheduled in the Task Scheduler. This utility is used to perform a series of tasks in a routine, or if they are triggered by an event.
This method is especially useful for Windows 10 Home users who don’t have the group policy editor in their systems (although they can install gpedit.msc easily).
- Open Task Scheduler by going to Run –> taskschd.msc.
- In the Task Scheduler, navigate to the following in the left pane:
Task Scheduler Library --> Microsoft --> Windows --> UpdateOchestrator - In the middle pane, right-click Reboot_AC and click Disable.
- Then right-click Reboot_Battery and click Disable.

By performing the above, the computer will not restart without your input.

No comments:
Post a Comment