
Disclaimer: Editing the Windows Registry file is a serious undertaking. A corrupted Windows Registry file could render your computer inoperable, requiring a reinstallation of the Windows 10 operating system and potential loss of data. Back up the Windows 10 Registry file and create a valid restore point before you proceed.
To get started, open the registry editor by typing "regedit" into the search box located on the Windows 10 desktop and then click the appropriate item in the search results. Navigate to the following key, as shown in Figure A:
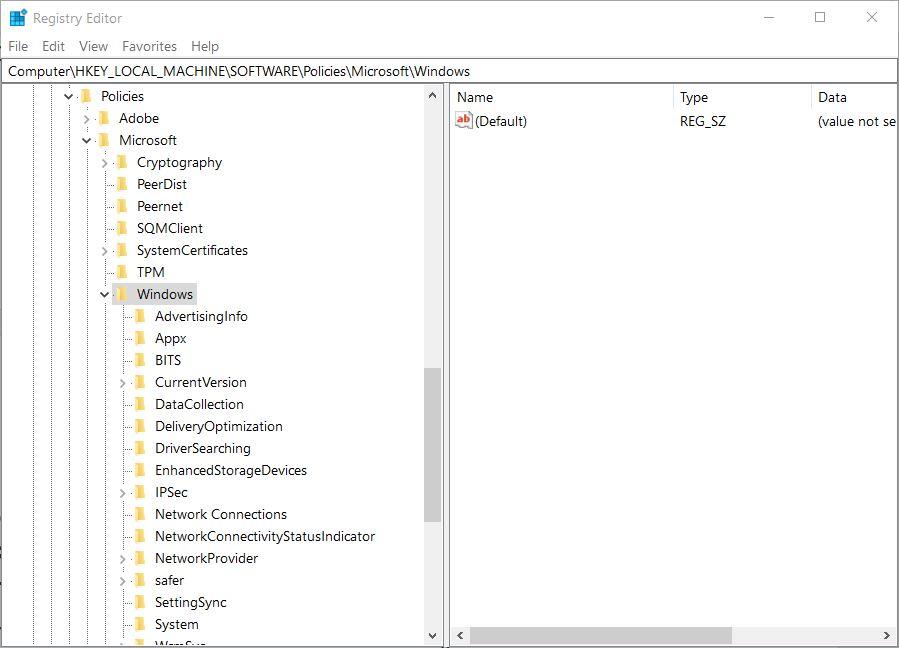
Search under the Windows folder for a key named "Personalization." As is the case in our example, it is possible that the Personalization key will not exist, which means we will have to create it.
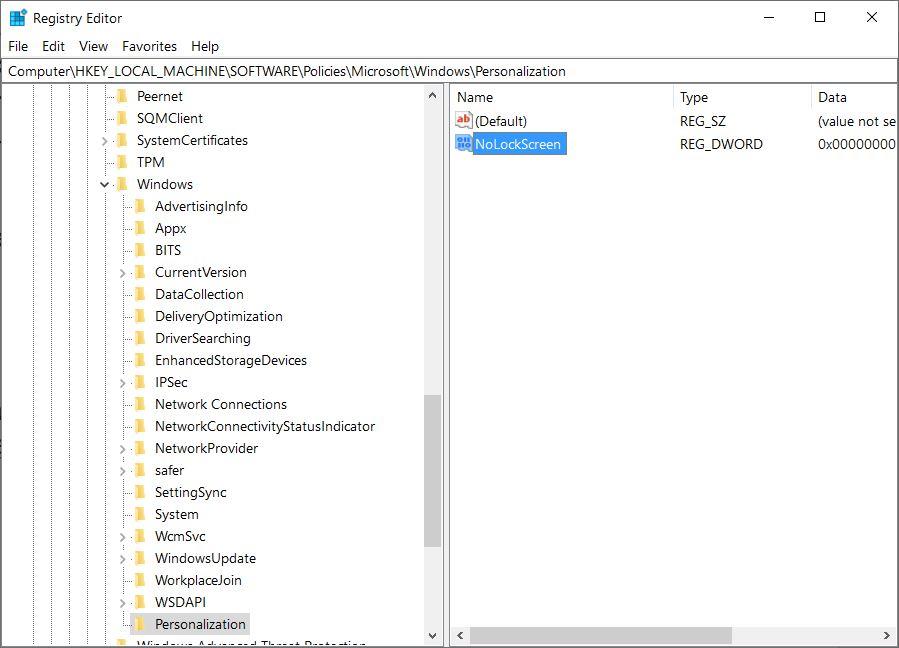
Right-click the Windows key and select New | Key and give it the name Personalization, as shown in Figure B.

Now, right-click the new Personalization key you just created and select New | DWORD (32-bit) Value. Enter NoLockScreen as the name, as shown in Figure C.
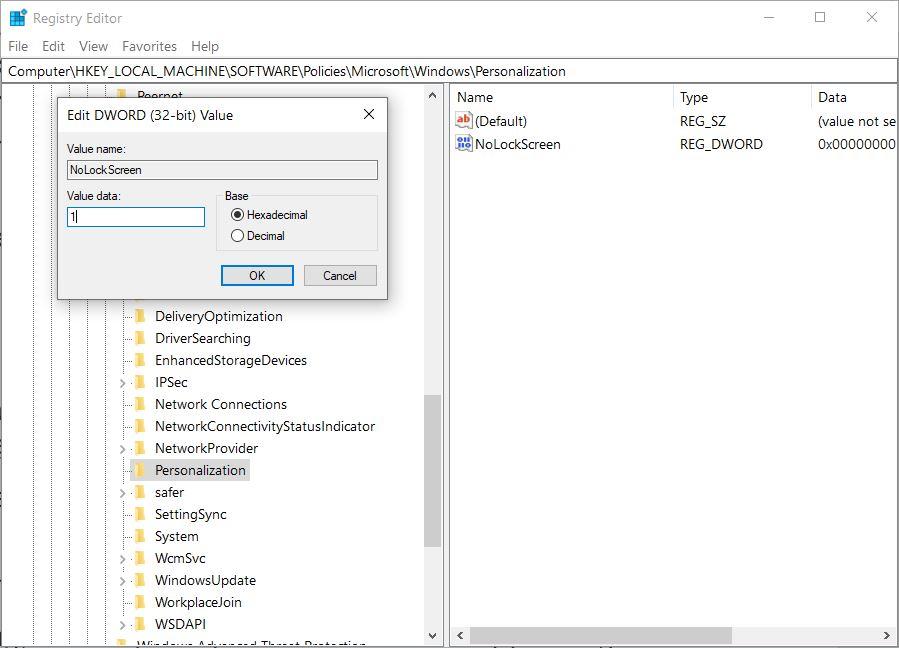
Double-click the NoLockScreen entry you just created and change the value to 1, as shown in Figure D.
Click the menu item File and then select Exit to close the registry editor.
To test the success of your editing, manually lock your Windows 10 PC by pressing the Windows logo key + L (a popular keyboard shortcut). Instead of the lock screen you would typically see, you should now see only the login screen, patiently waiting for you to enter your credentials.
If you ever want the Windows 10 lock screen back, just edit the Windows Registry file again and change the value of the NoLockScreen key back to 0.
No comments:
Post a Comment