
1. Open File Explorer and select This PC.
2. Click the Map network drive drop-down in the ribbon menu at the top, then select "Map network drive." (This is under the Computer tab, which should open automatically when you go to This PC, as above.)

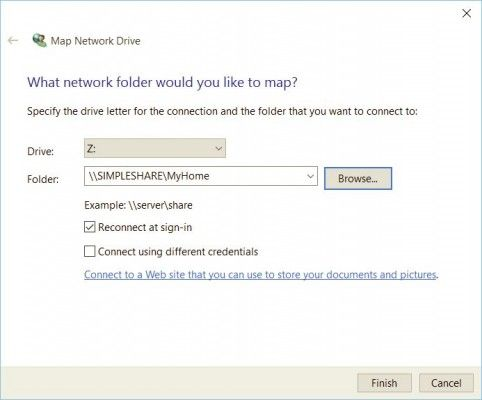
3. Select the drive letter you want to use for the network folder, then hit Browse.
4. If you receive an error message, then you'll need to turn on network discovery. To do so, open the Control Panel, select Network and Sharing Center and choose Change advanced sharing settings from the top-left corner. From there, select Turn on network discovery. Save changes.

5. Navigate to the folder you want to map and hit OK after selecting it.
6. Confirm your selection and click Finish. You can choose to reconnect to the folder every time you sign in so it's always available. You can even use a different user account to connect to the folder if needed.
7. When you're done, you should see the new drive letter under This PC and will be able to access its contents like you would any other folder. If you want to disconnect the network drive, right-click on it and select Disconnect.
No comments:
Post a Comment